How to Add Your VCAM XVR/NVR to SmartPSS via P2P for Remote Access
Description:
- This page will show you how to add your VCAM XVR/NVR to your computer in SmartPss via P2P for remote access.
Requirements:
- SmartPSS downloaded and installed on your computer.
- A VCAM XVR or NVR connected to the internet.
- P2P enabled on your VCAM XVR/NVR.
Instructions:
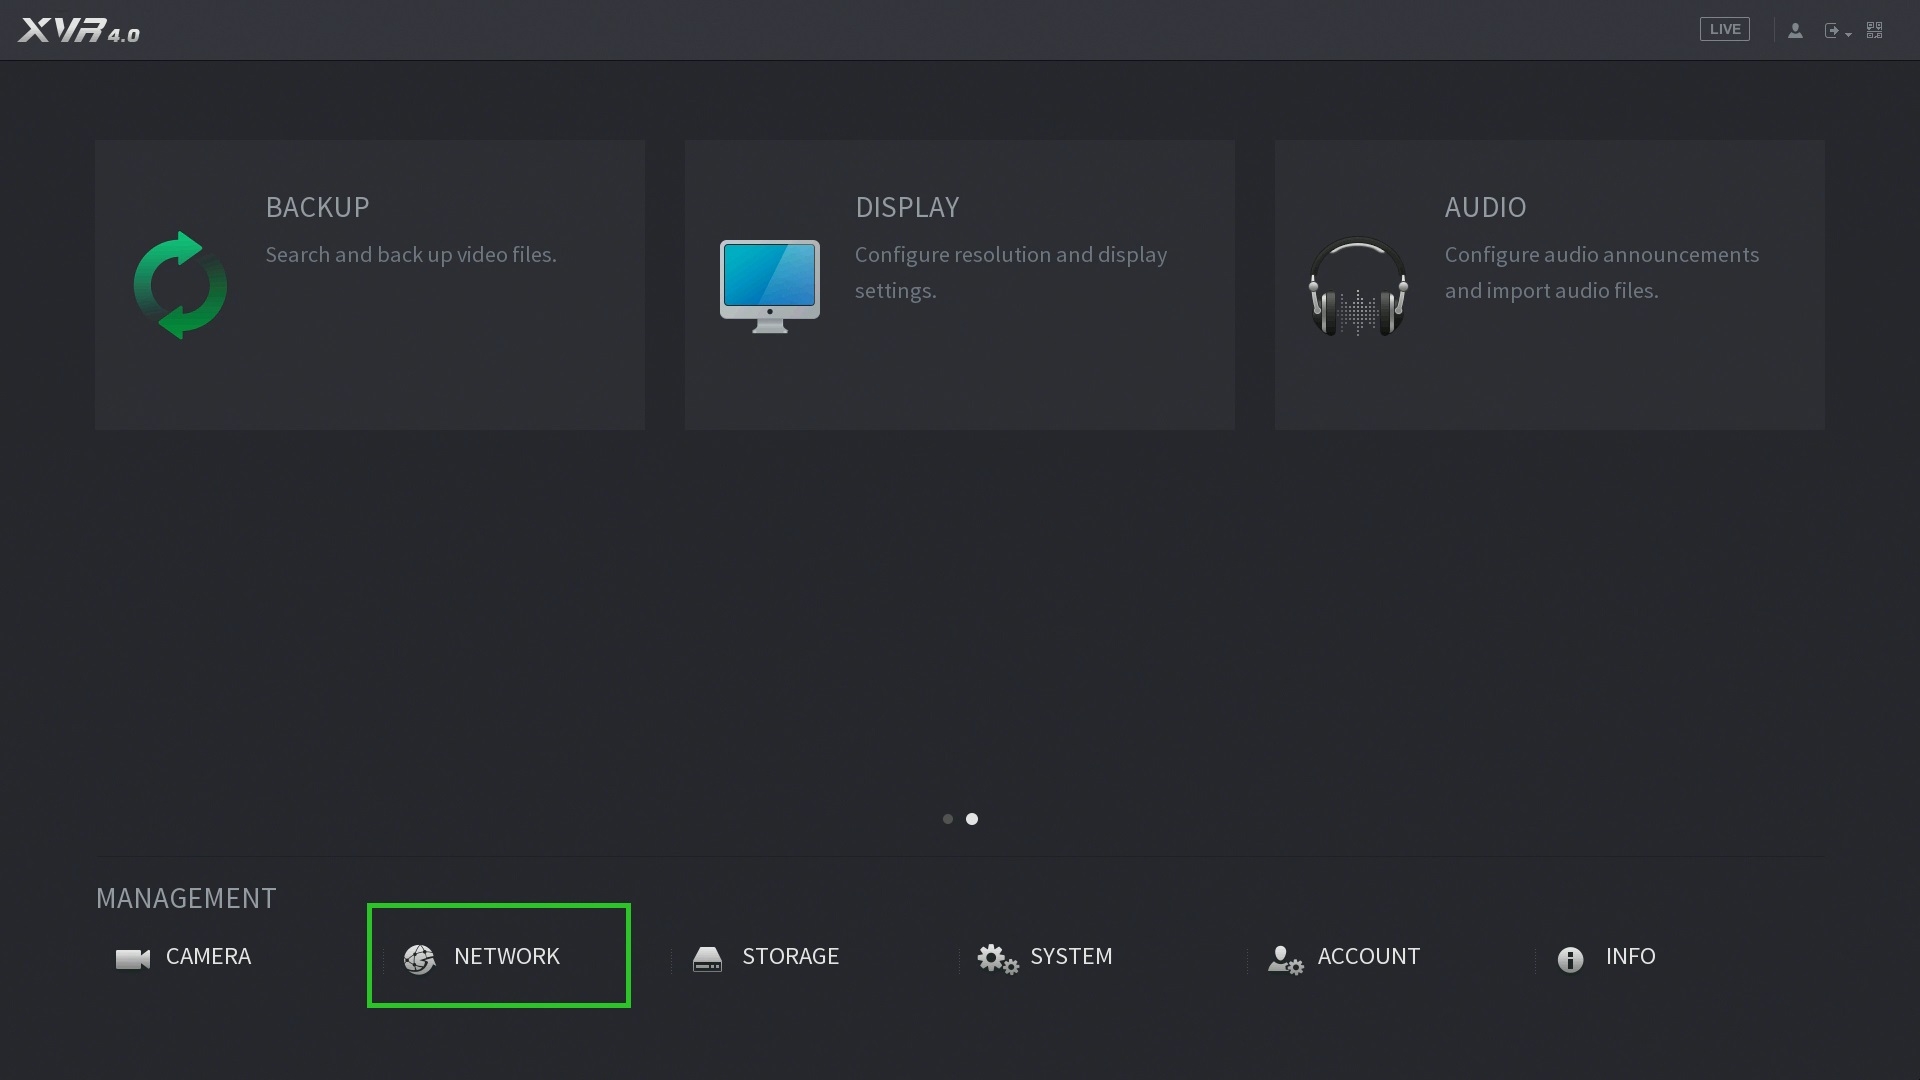
- On your VCAM XVR/NVR, navigate from the Main Menu > Network > P2P to confirm that P2P is online and to see the serial number of your device.

- Now open SmartPSS on your computer and log in.
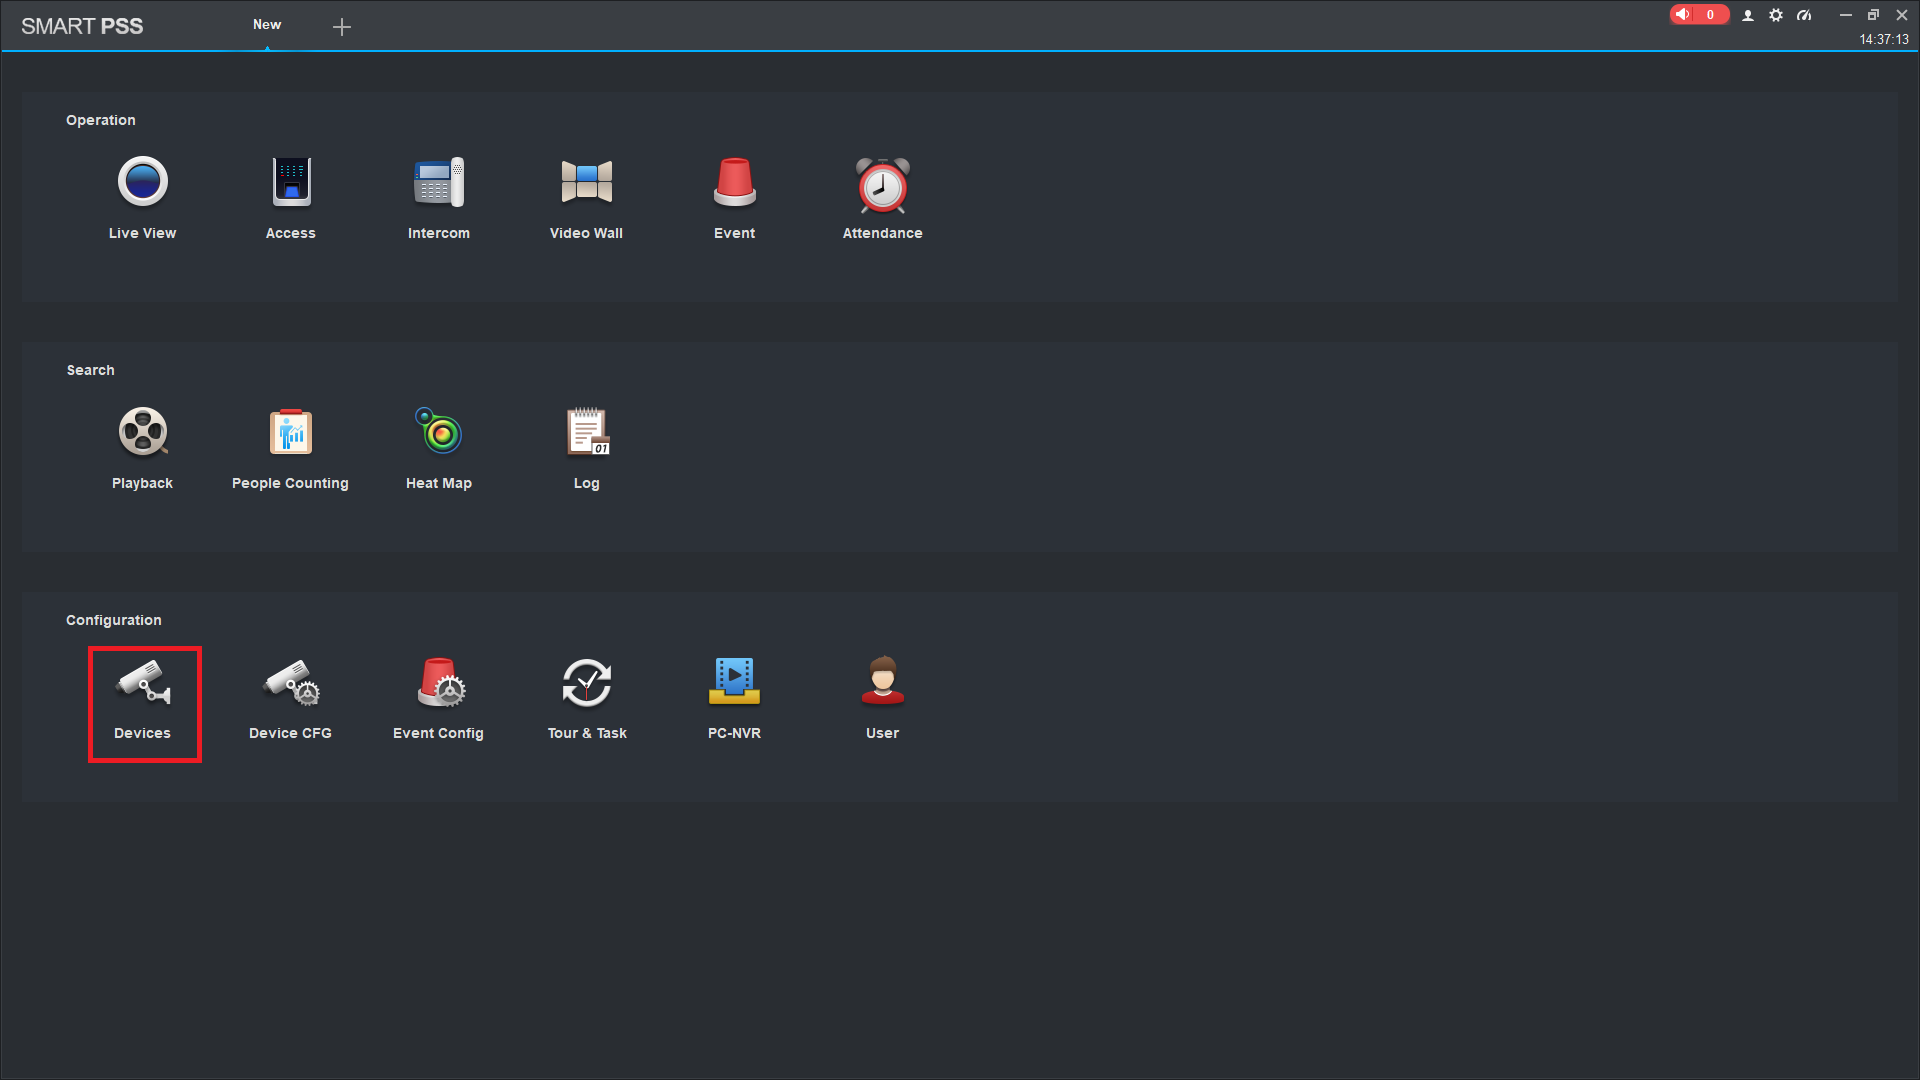
- If you are not there already, navigate to the main page. Click "Devices."
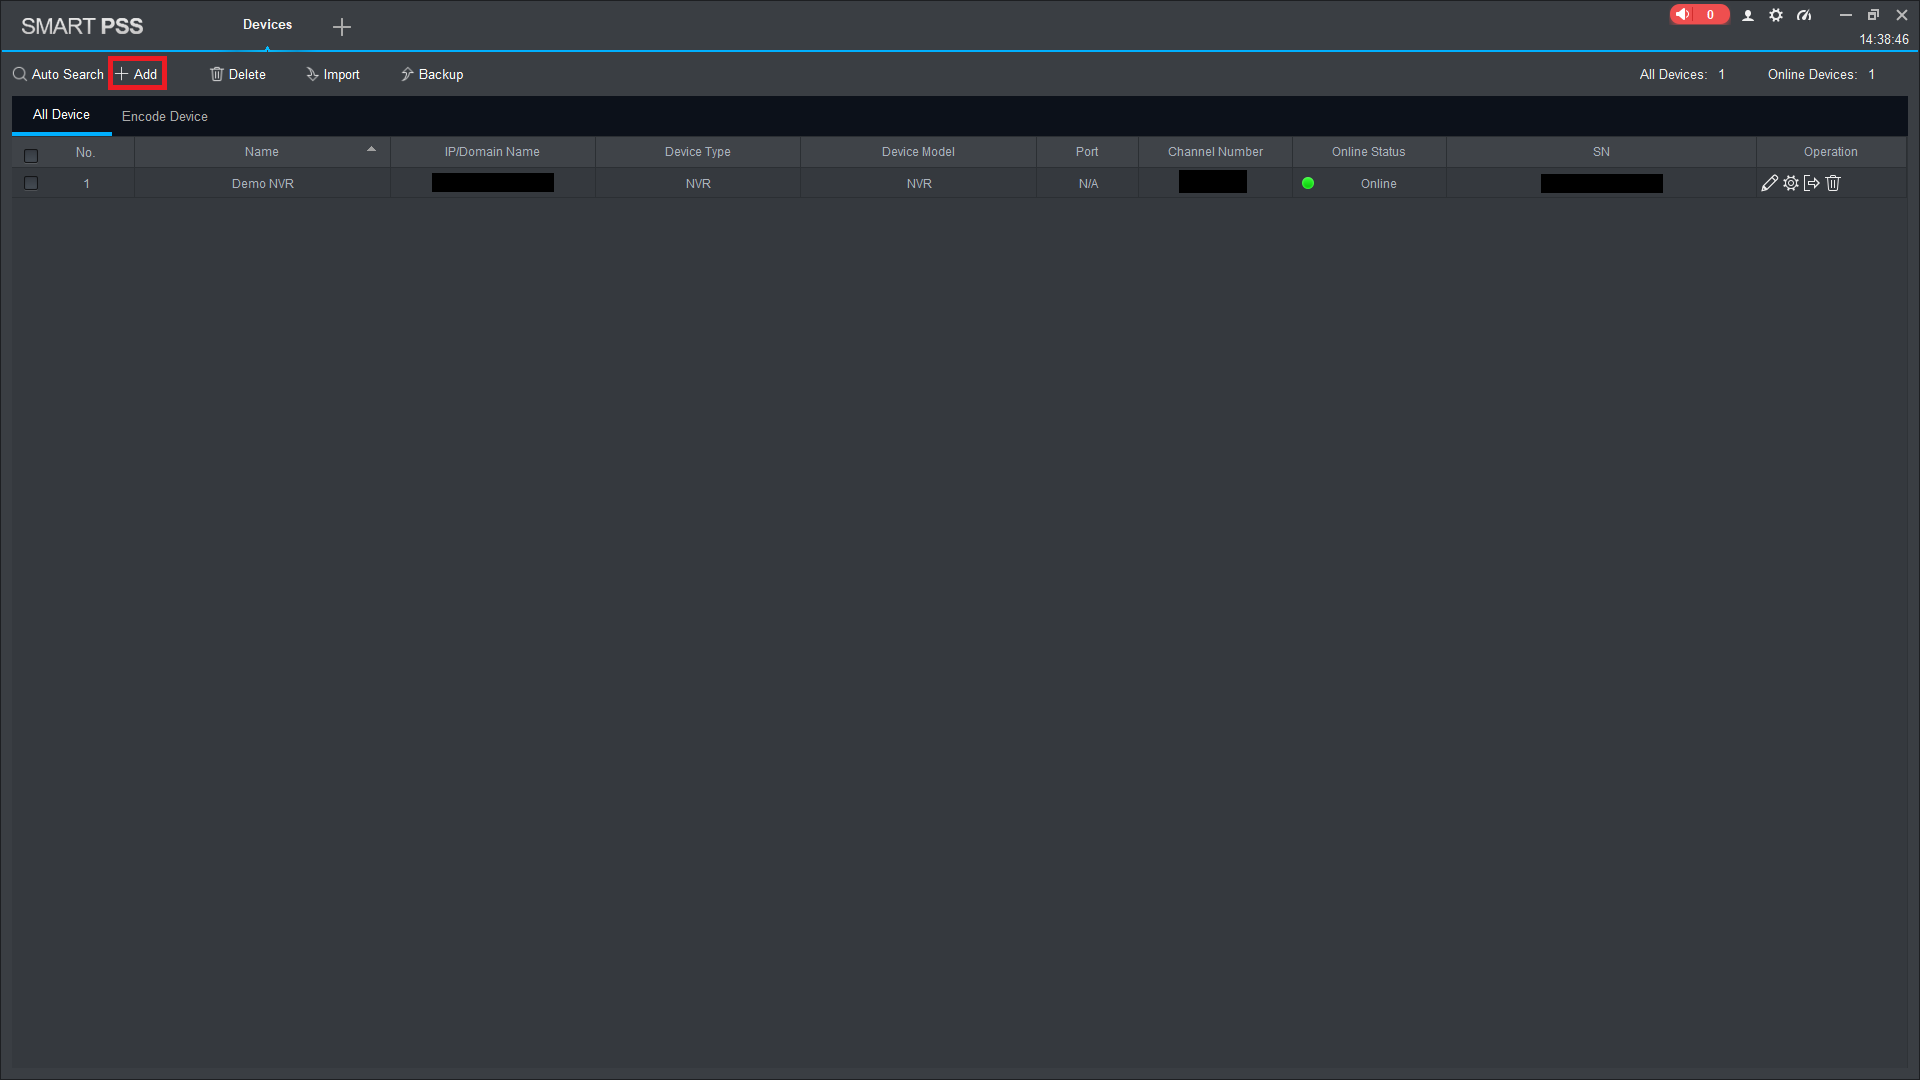
- Click "+Add" to add a new device.
- The "Manual Add" window should appear. Click the "Method to add" dropdown menu and change it from "IP/Domain" to "SN (For Device Support P2P)."
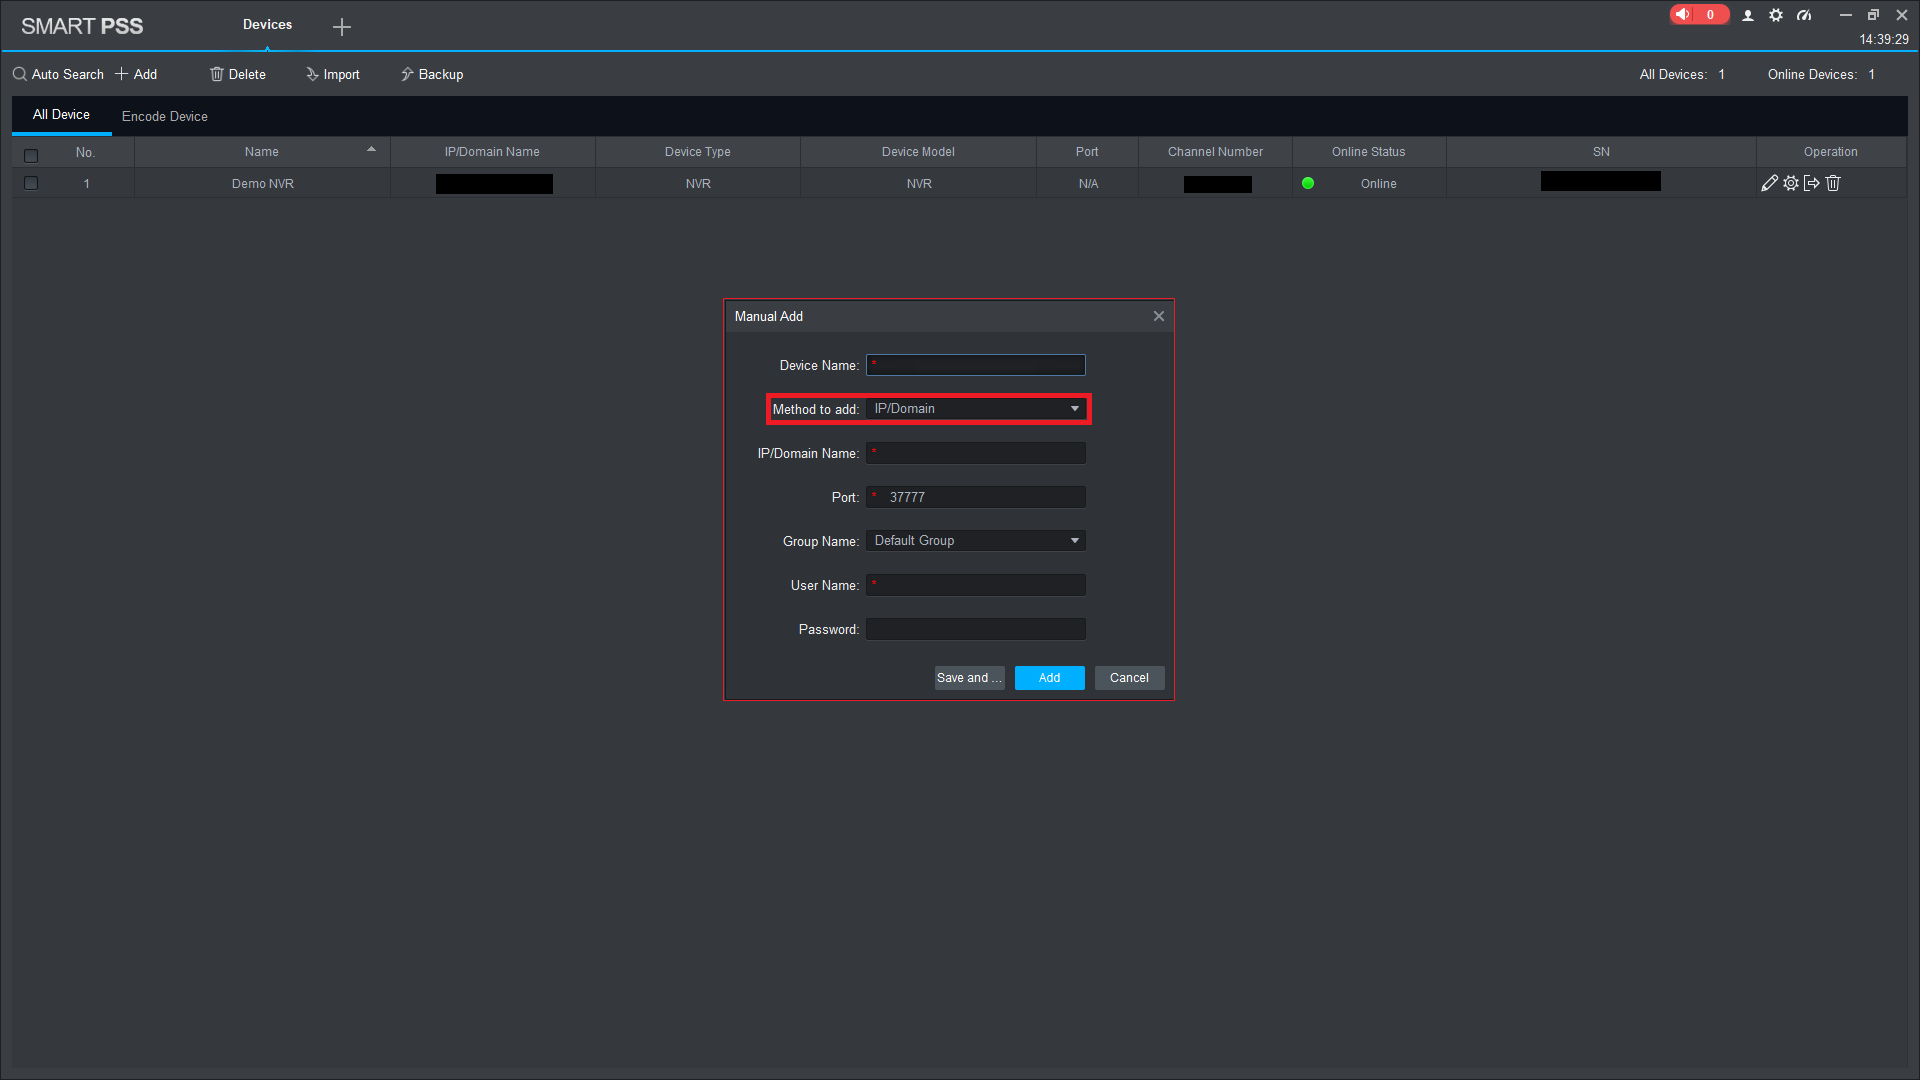
- Under "Device Name," enter the name you would like to call your device. Under "SN," enter your device's serial number (found in the P2P menu in Step 1). Under "User Name," enter the account username on your device, then enter the corresponding password for that account under "Password." Click "Add" once these fields have been filled.

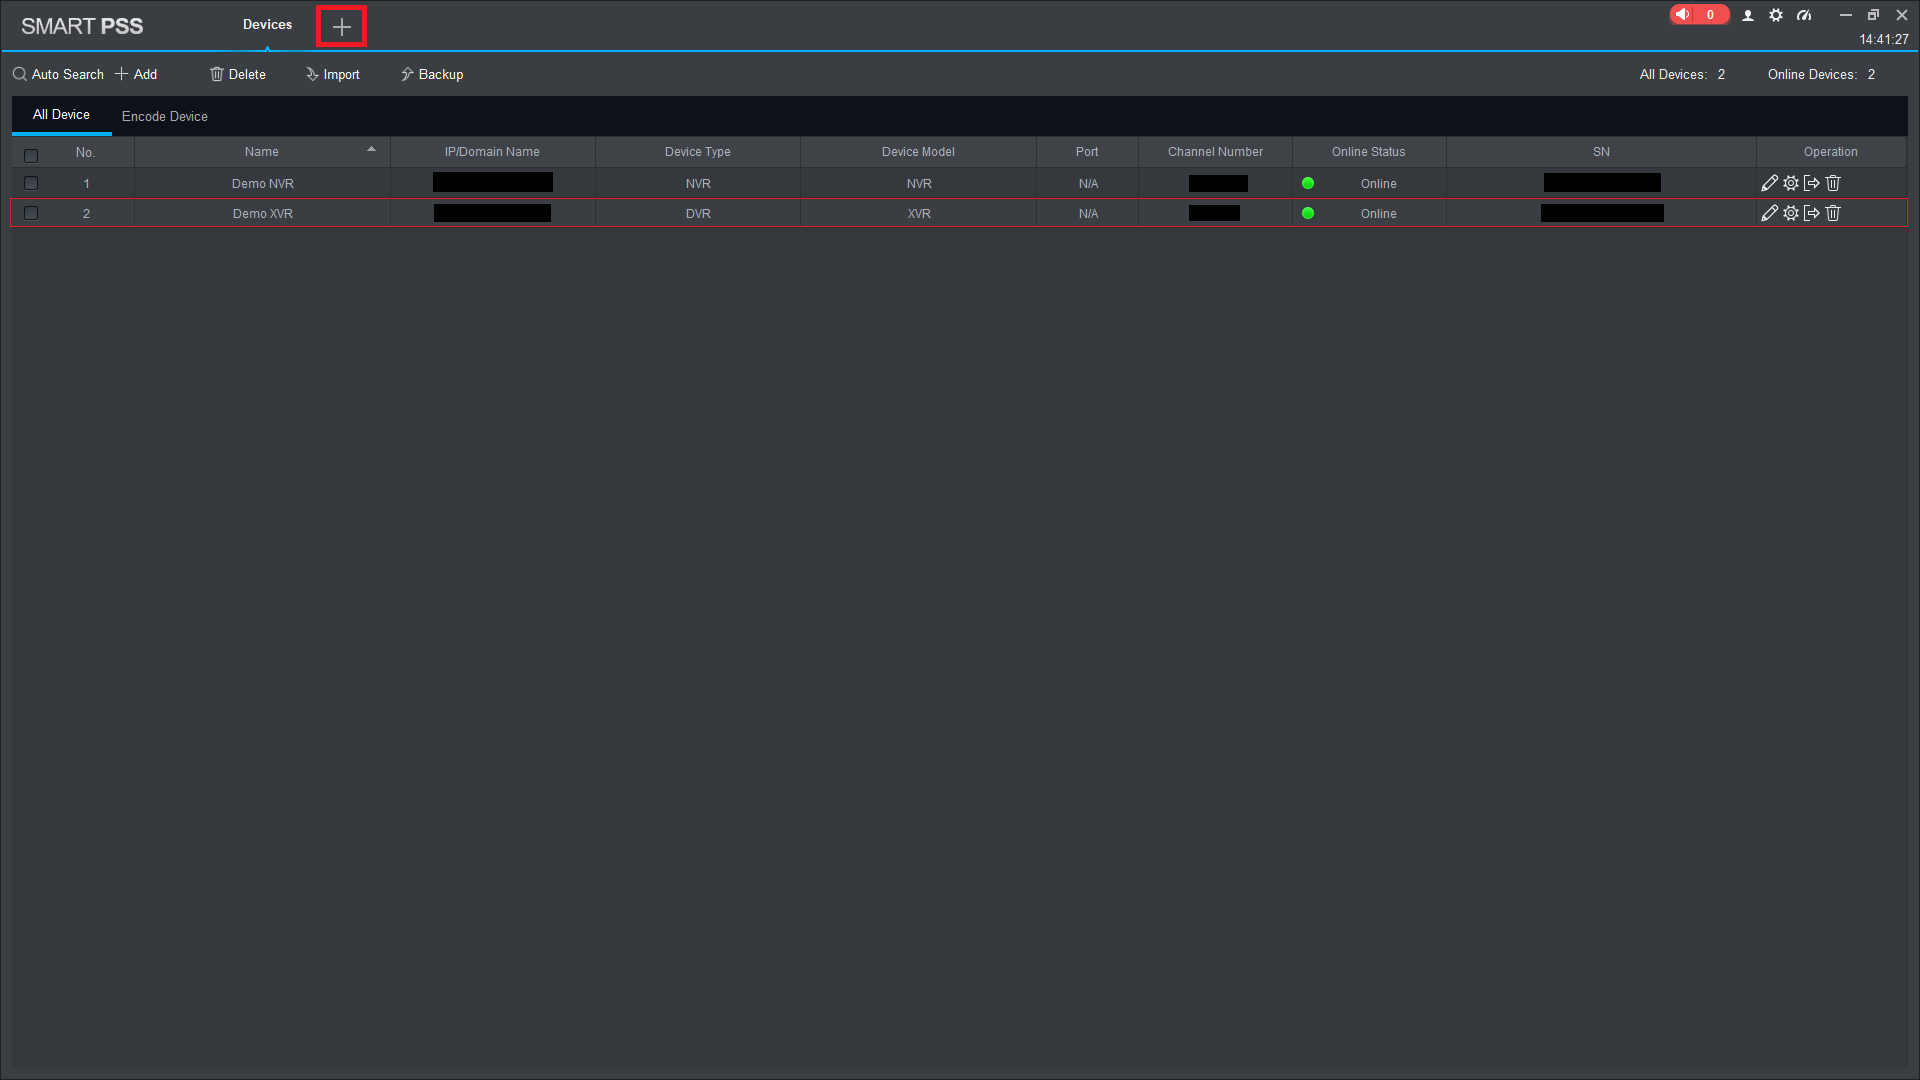
- If the details you entered are correct, your device should appear after a few seconds. After that, the "Online Status" cell should turn green, letting you know that your device is ready to access. To view or make changes to your device, click the "+" button at the top of your screen to return to the main page.
= NOTE: If your details are correct but you receive a "failed to connect" error, try restarting SmartPSS and the device adding process. If you still receive an error, make sure that your device is connected to the internet, that P2P is enabled, and that you do not have a network setting on your router blocking P2P access.
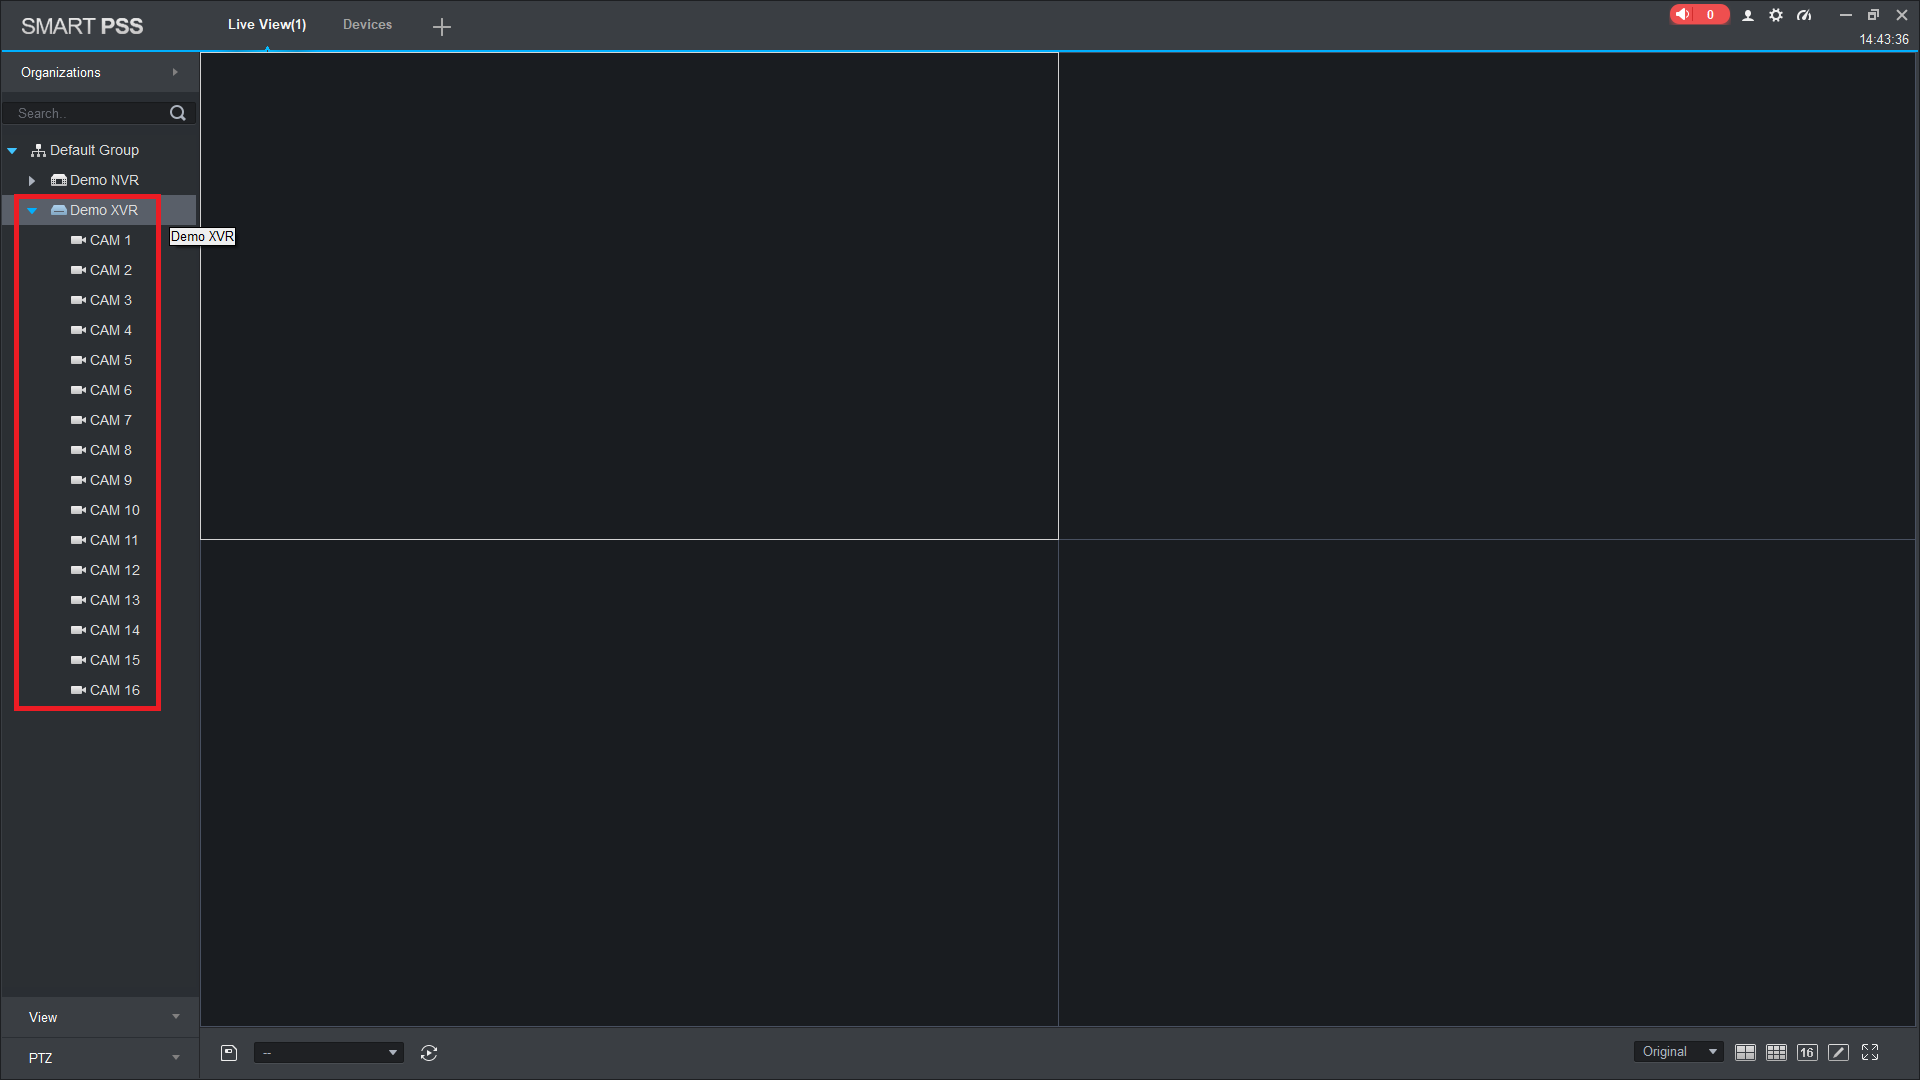
- Click "Live View." This will allow you to see your newly-added device (and any others you may have added).
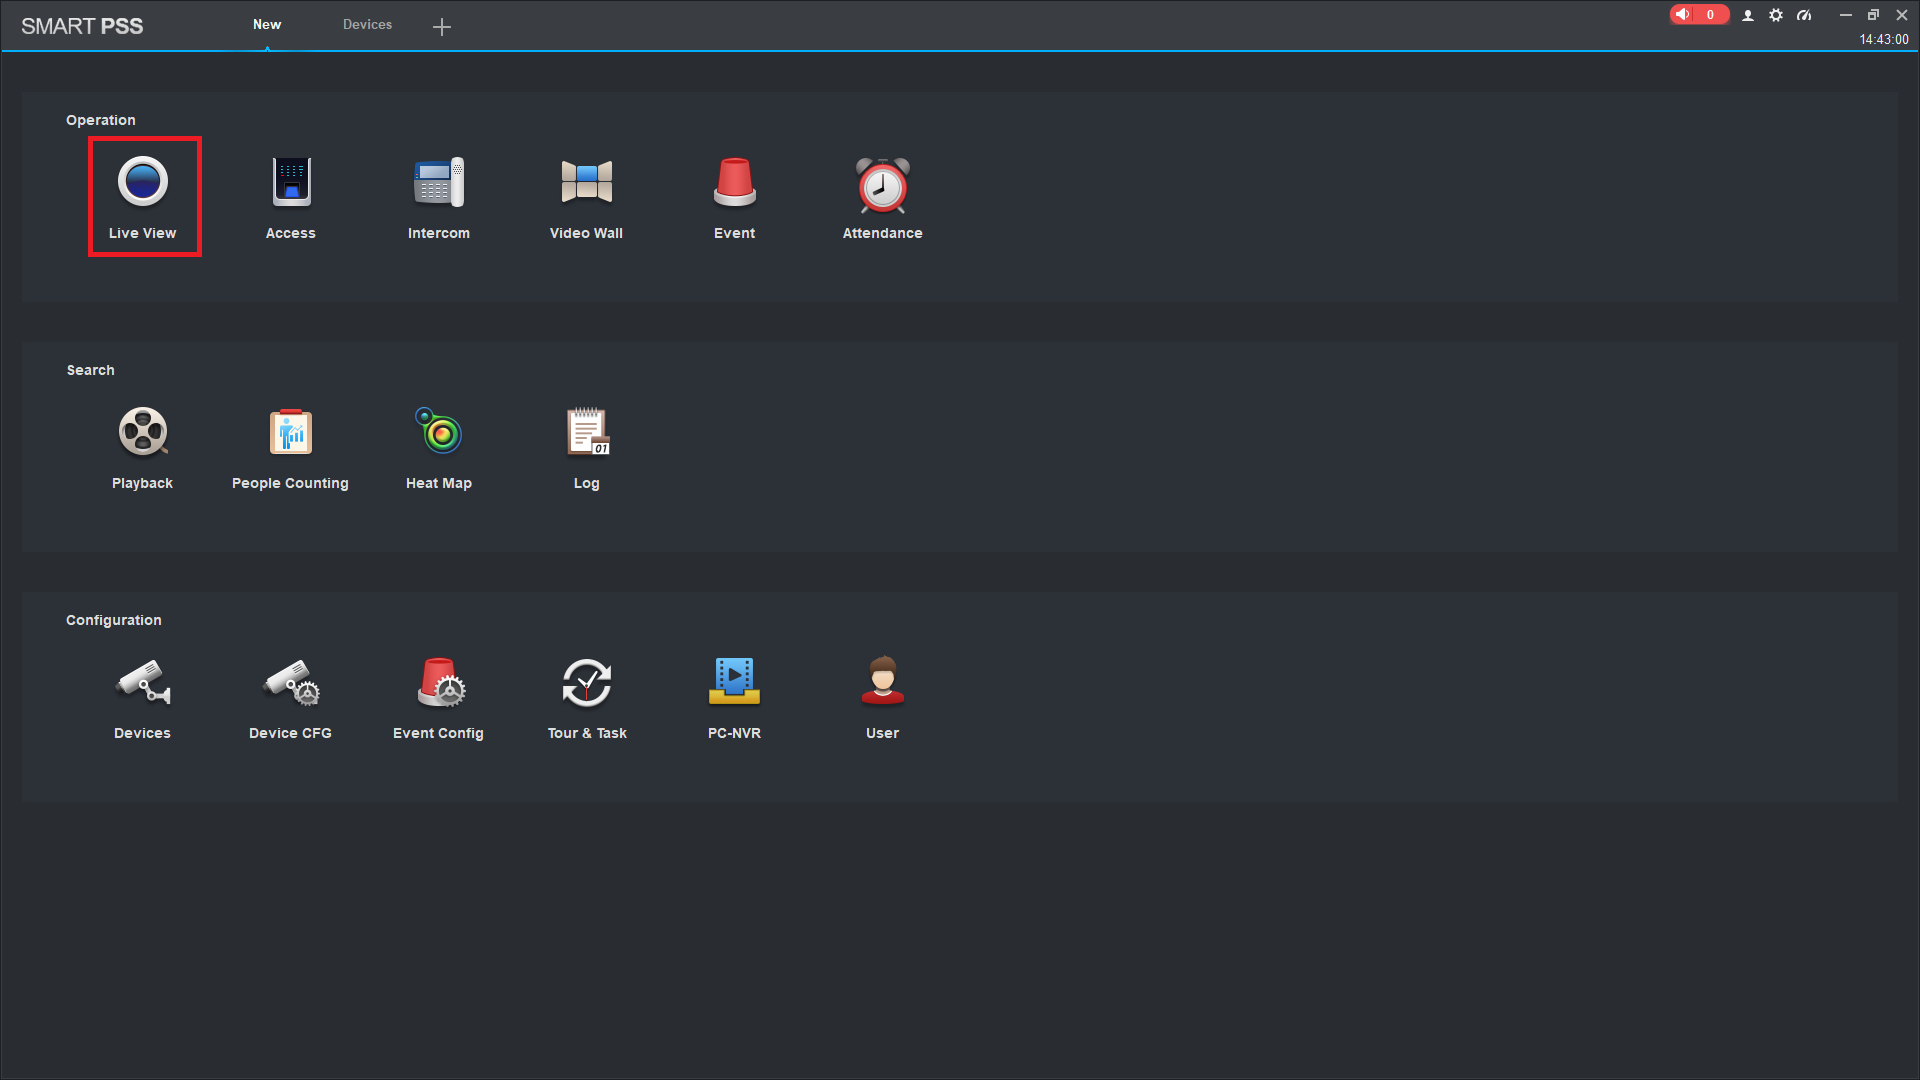
- Your new device should appear in the left pane with a dropdown menu showing you all active channels and attached devices. You can drag-and-drop those channels/attached devices into one of the viewing panes in the center of the screen to view live input from those channels/devices.